Instructions for our 3D printers Ultimaker 2+ Connect.
Please note:
- Our printers are of the model ”Ultimaker 2+ Connect” (not Ultimaker 2 or Ultimaker 2+)
- We only use PLA in the school printers (there are many othe rmaterials we could use, but for health and safety reasons PLA is the only material we use). Even if you bring your own material, only use only PLA.
Printing instructions:
- Create your 3D model in e.g. TinkerCAD and download it as an .stl-file, or download someone else’s .stl-file from some website like Thingverse or Printables.
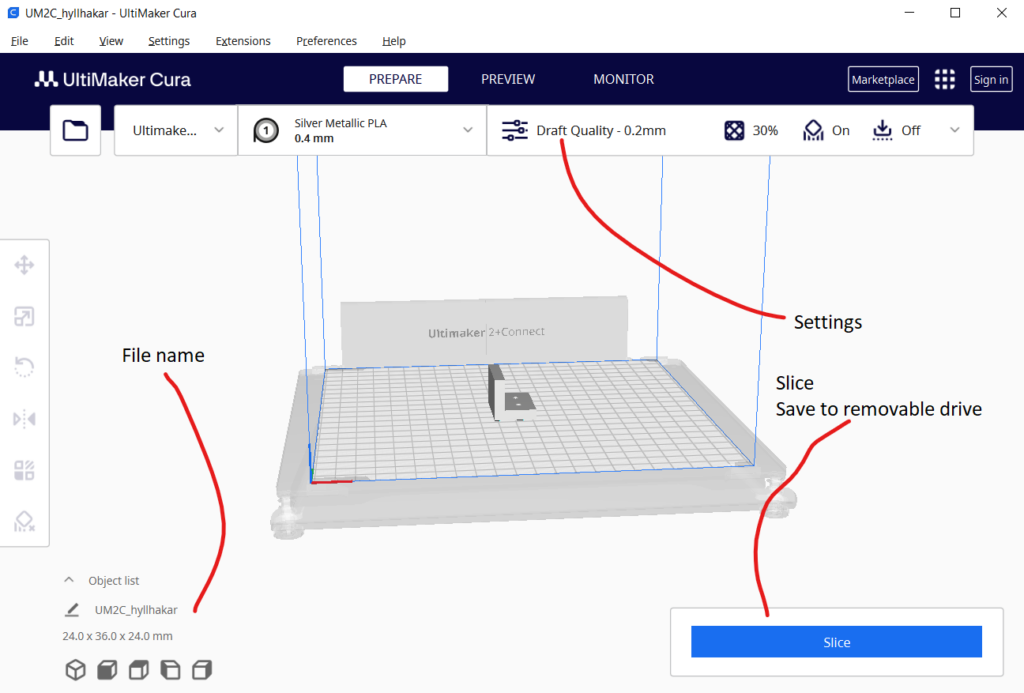
- Open Cura on the Makerspace computer and import your .stl-file (e.g. by transferring it from your own computer on a USB-stick)
- Change the settings if needed and then press ”Slice” (this slices the 3D-model into hundreds of thin layers the printer can then start to build up)
- You can then ”Preview” to see how the printer will move layer by layer, or just press ”Save to removable drive” (make sure you have an USB-drive conected to the Cura-computer).
- Move the USB-stick to the printer, and choose the correct file in the menu (you can check the file name in the bottom left of Cura).
Create Education playlist on Troubleshooting and Maintenance for 2+ Connect (this is a good place to look for help if everything goes wrong)